The Rhody Survivalist ~ Online Resources
Rhody Survivalist: Tools
Tools for Hunting:
Tools for Winter:
The Roy Croft Snowshoe:
You never know when you are going to get stranded somewhere in the winter time. If you've ever tried to slog through waist deep snow, the energy drain can be incrdible. As we know, once you enter survival mode, you re-join the animals in the world of energy concervation. Snowshoes provide a much easier means of walking across snowy landscaped by allowing you to "float" on top of the snow instead of moving through it. A quick and easy to build pair of snowshoes can allow you to get back to your Quinzhee before the coming storm.
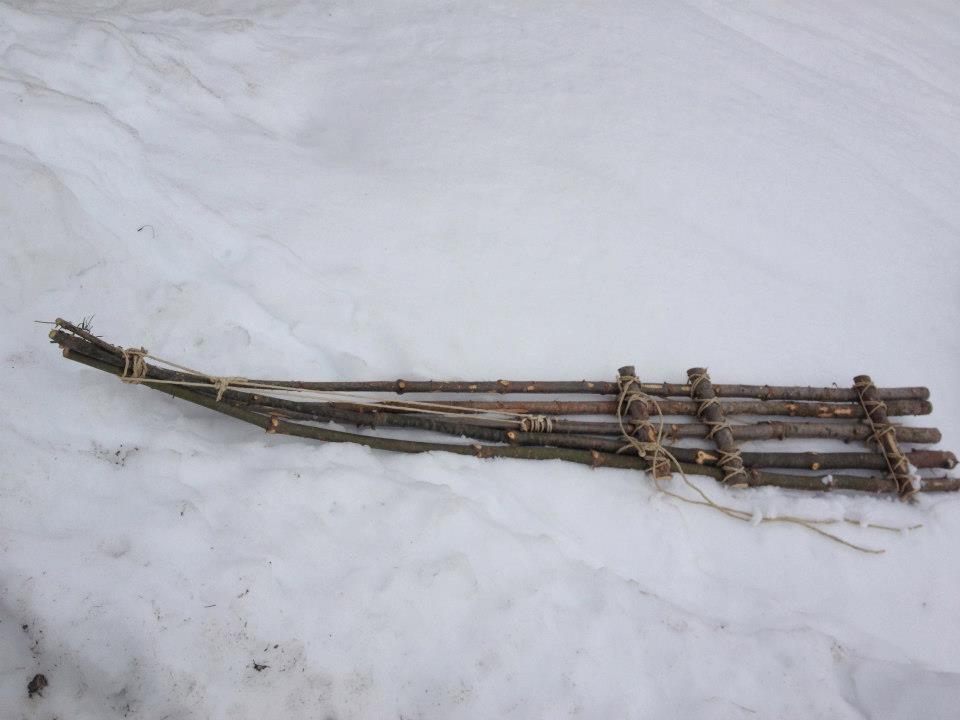
My Roy Croft Snowshoe, a key design consideration is center of weight as when you pick up your foot the tail of the snowshoe has to go down so the tip goes up.
Roy Croft Design Considerations:
This snowshoe requires a large amount of cordage so be sure you have it to spare before you begin.
Sticks should be about as long as you are tall.
Usually 5-6 sticks wide but lighter snow may require additional width.
Straight green sapplings are the best material
(I used pine and spruce and found the pine to be much lighter)
Find the center of weight and put the foot blocks in place so as to allow the tip to come up when you lift your feet.
the binding should wrap beneath the center sapling, over the next two, under the
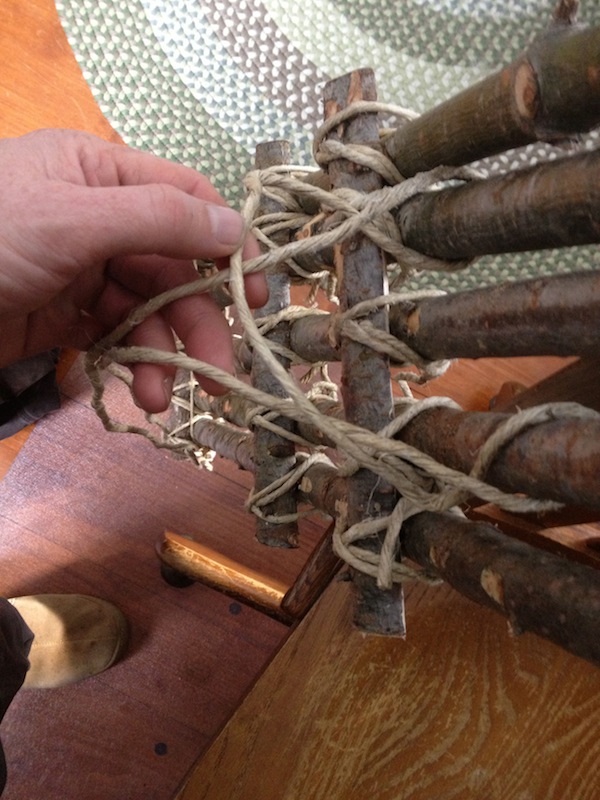
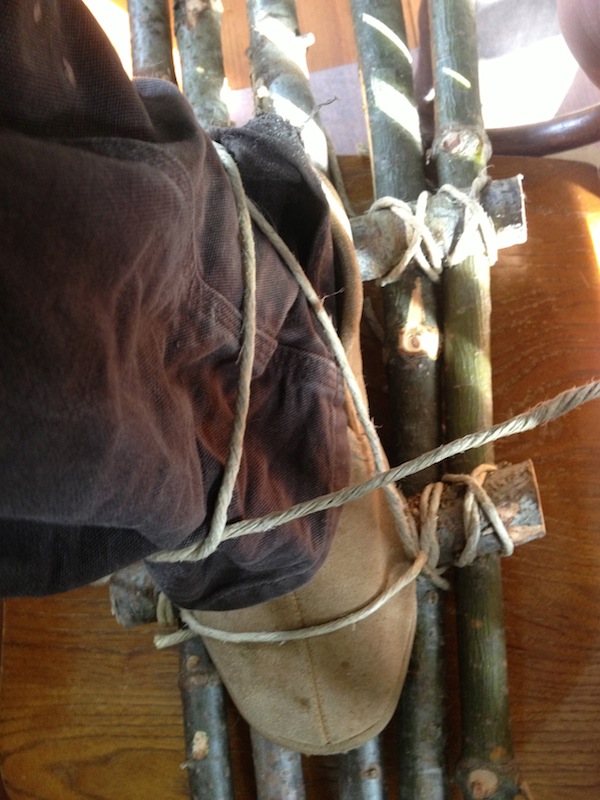
This ingenious binding technique shows how a single piece of cordage can be used to wrap through the saplings, making a self adjusting place to put your foot and then wrap once around your heel pull tight and tie to the front.
Some good snowshoe building articles:
http://livingprimitively.com/2007/01/roycroft-snowshoes/
http://fenlaners.blogspot.com/2007/11/roycroft-snowshoe.html
Snow Goggles:
Snow blindness can be debilitating. Make yourself some quick and stylish shades with some birchbark and a little cordage. Your eyes will be glad you did:
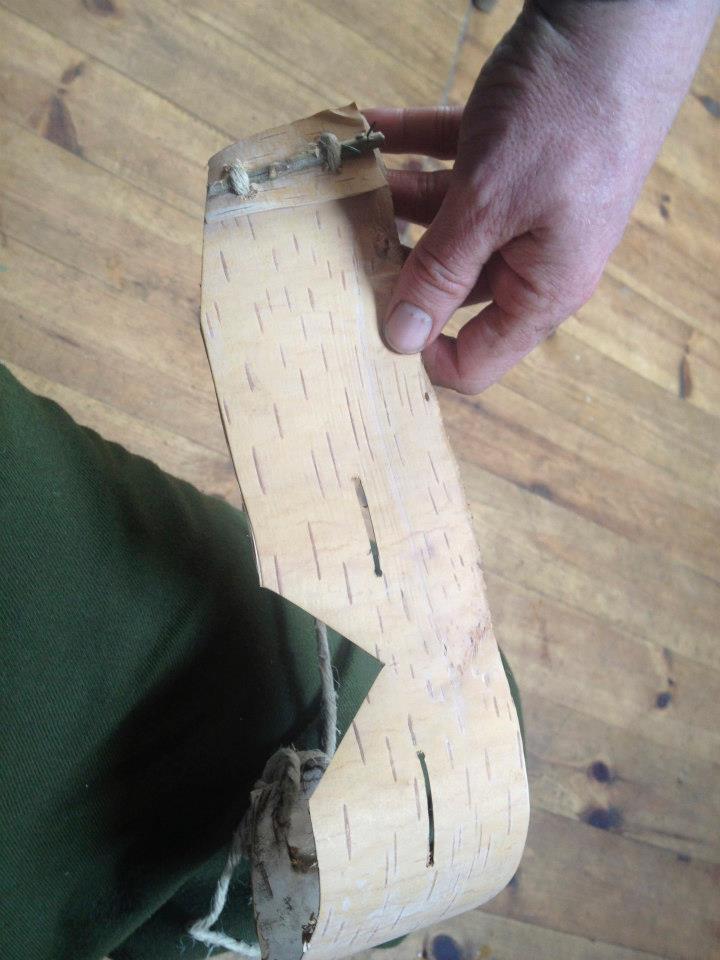
Nick Neddo of ROOTS hand crafted cedar snow goggles.
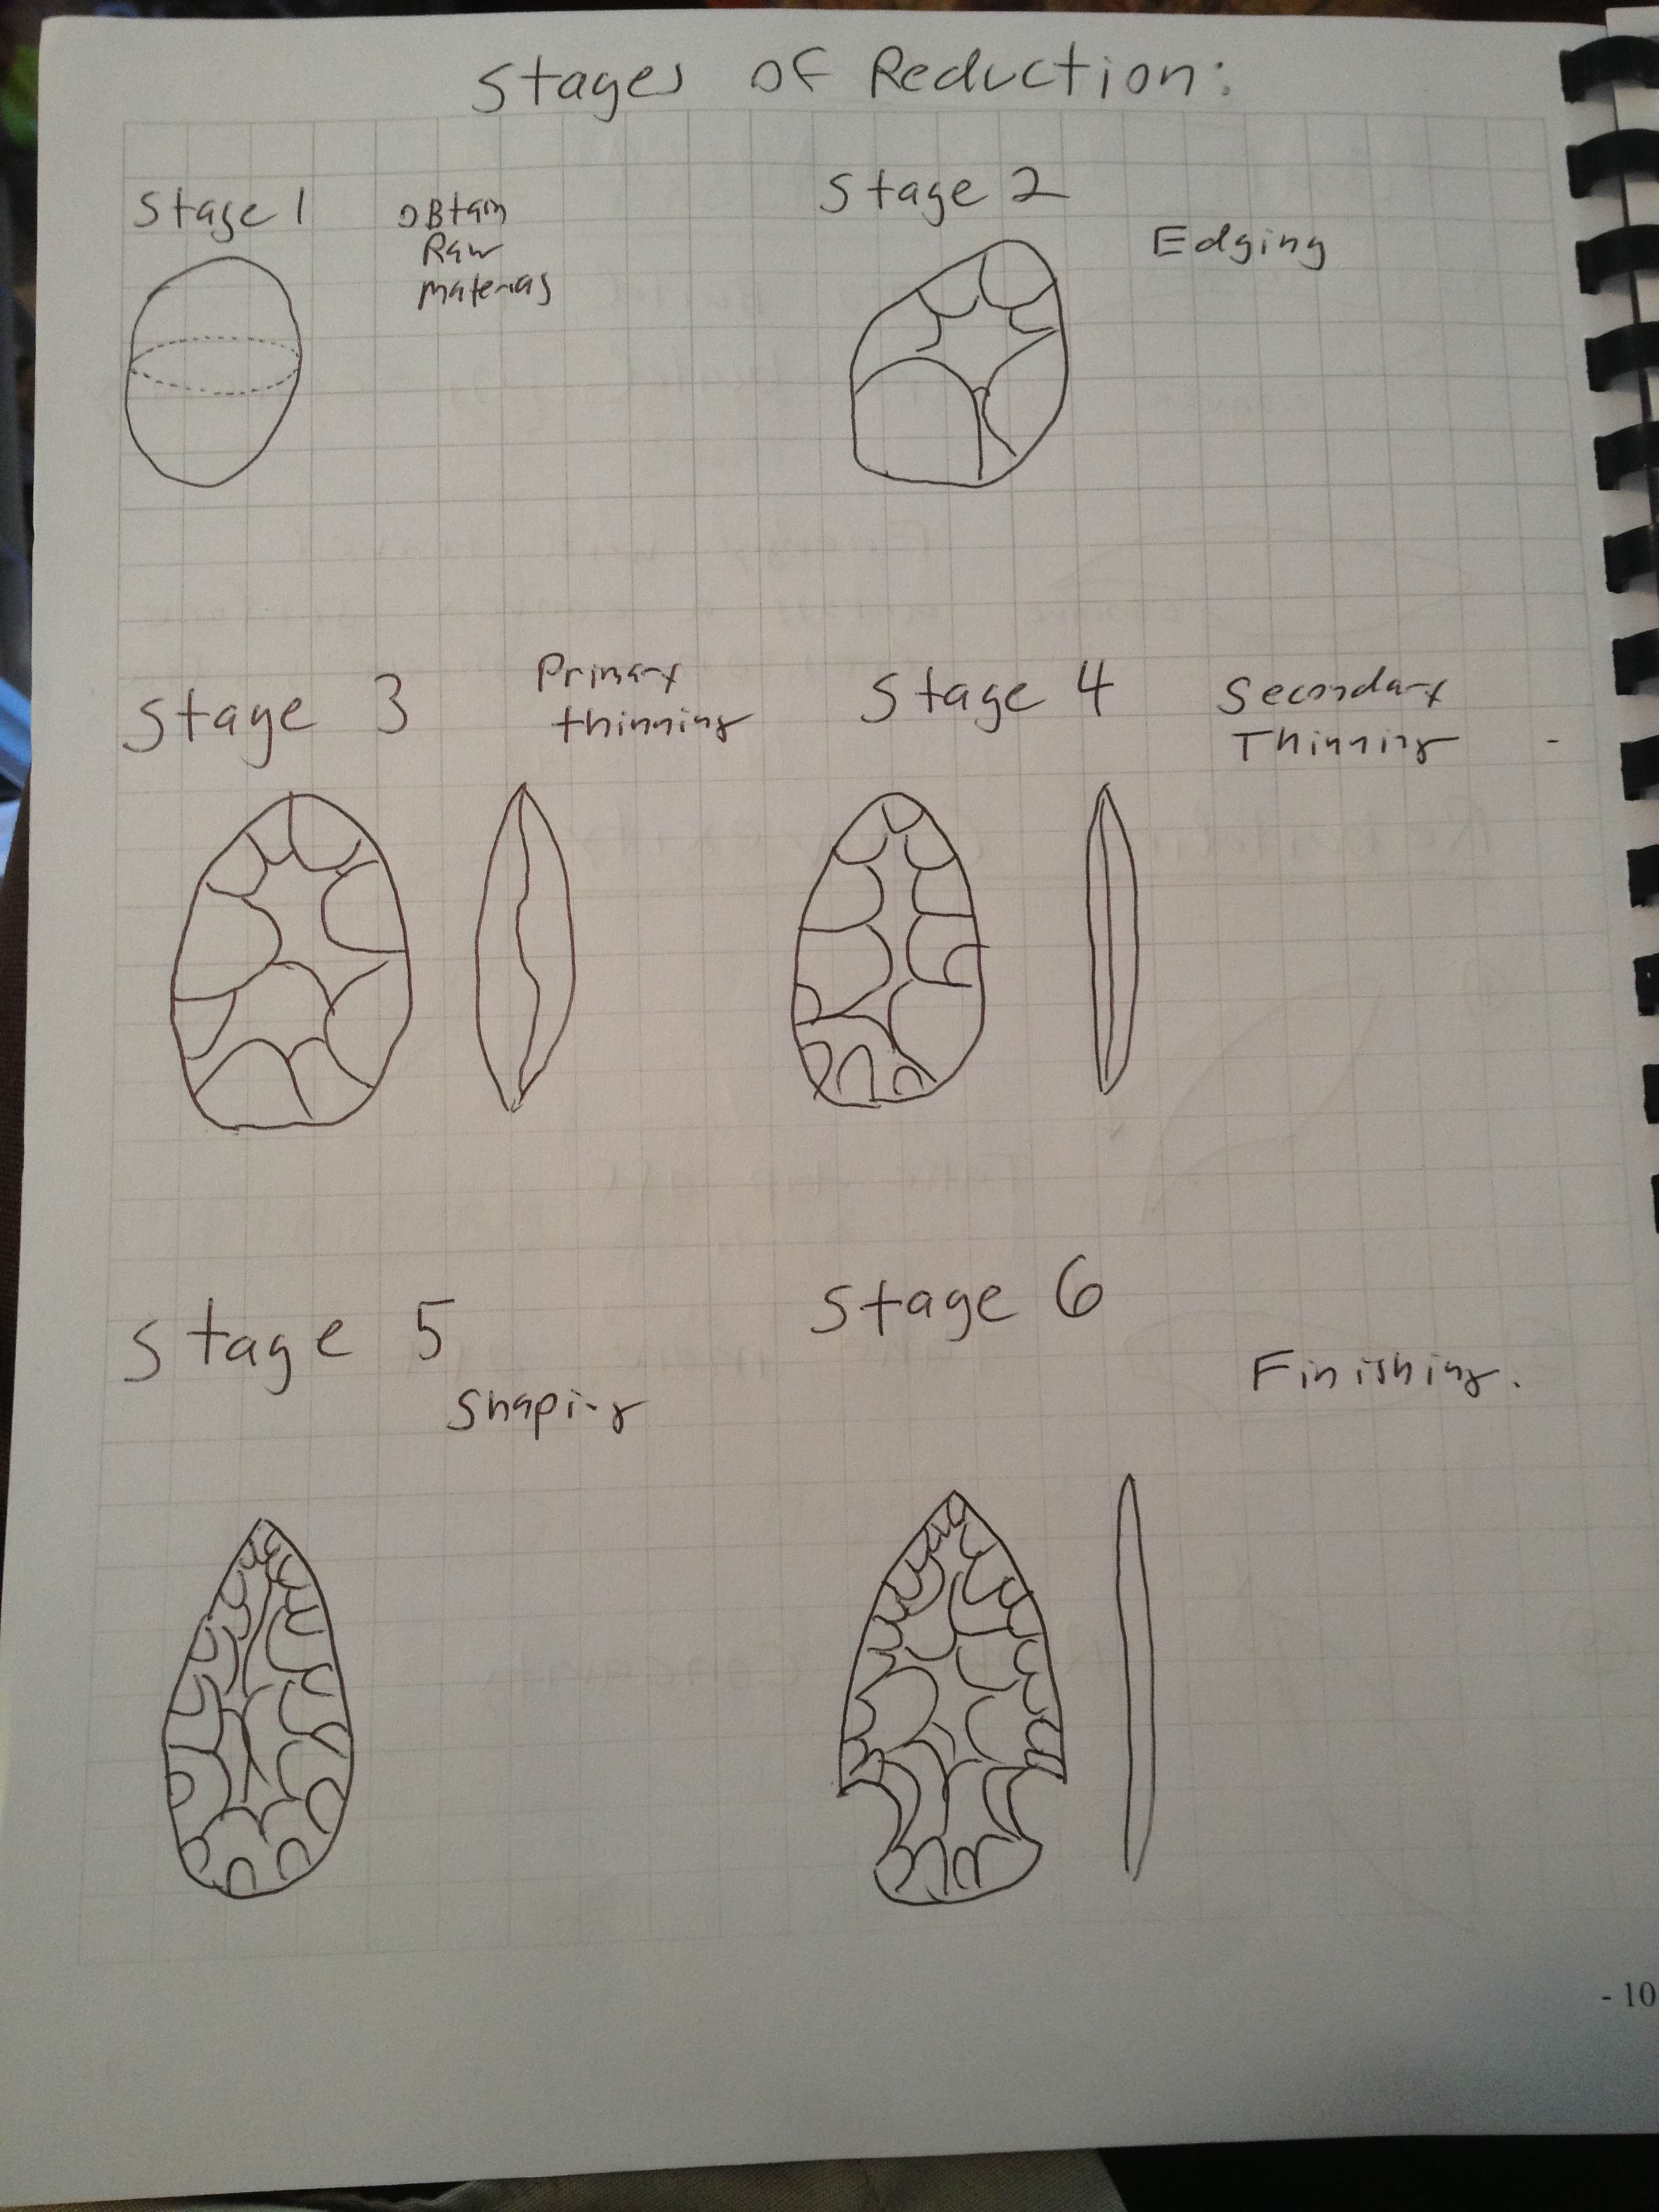
Stone Tools:
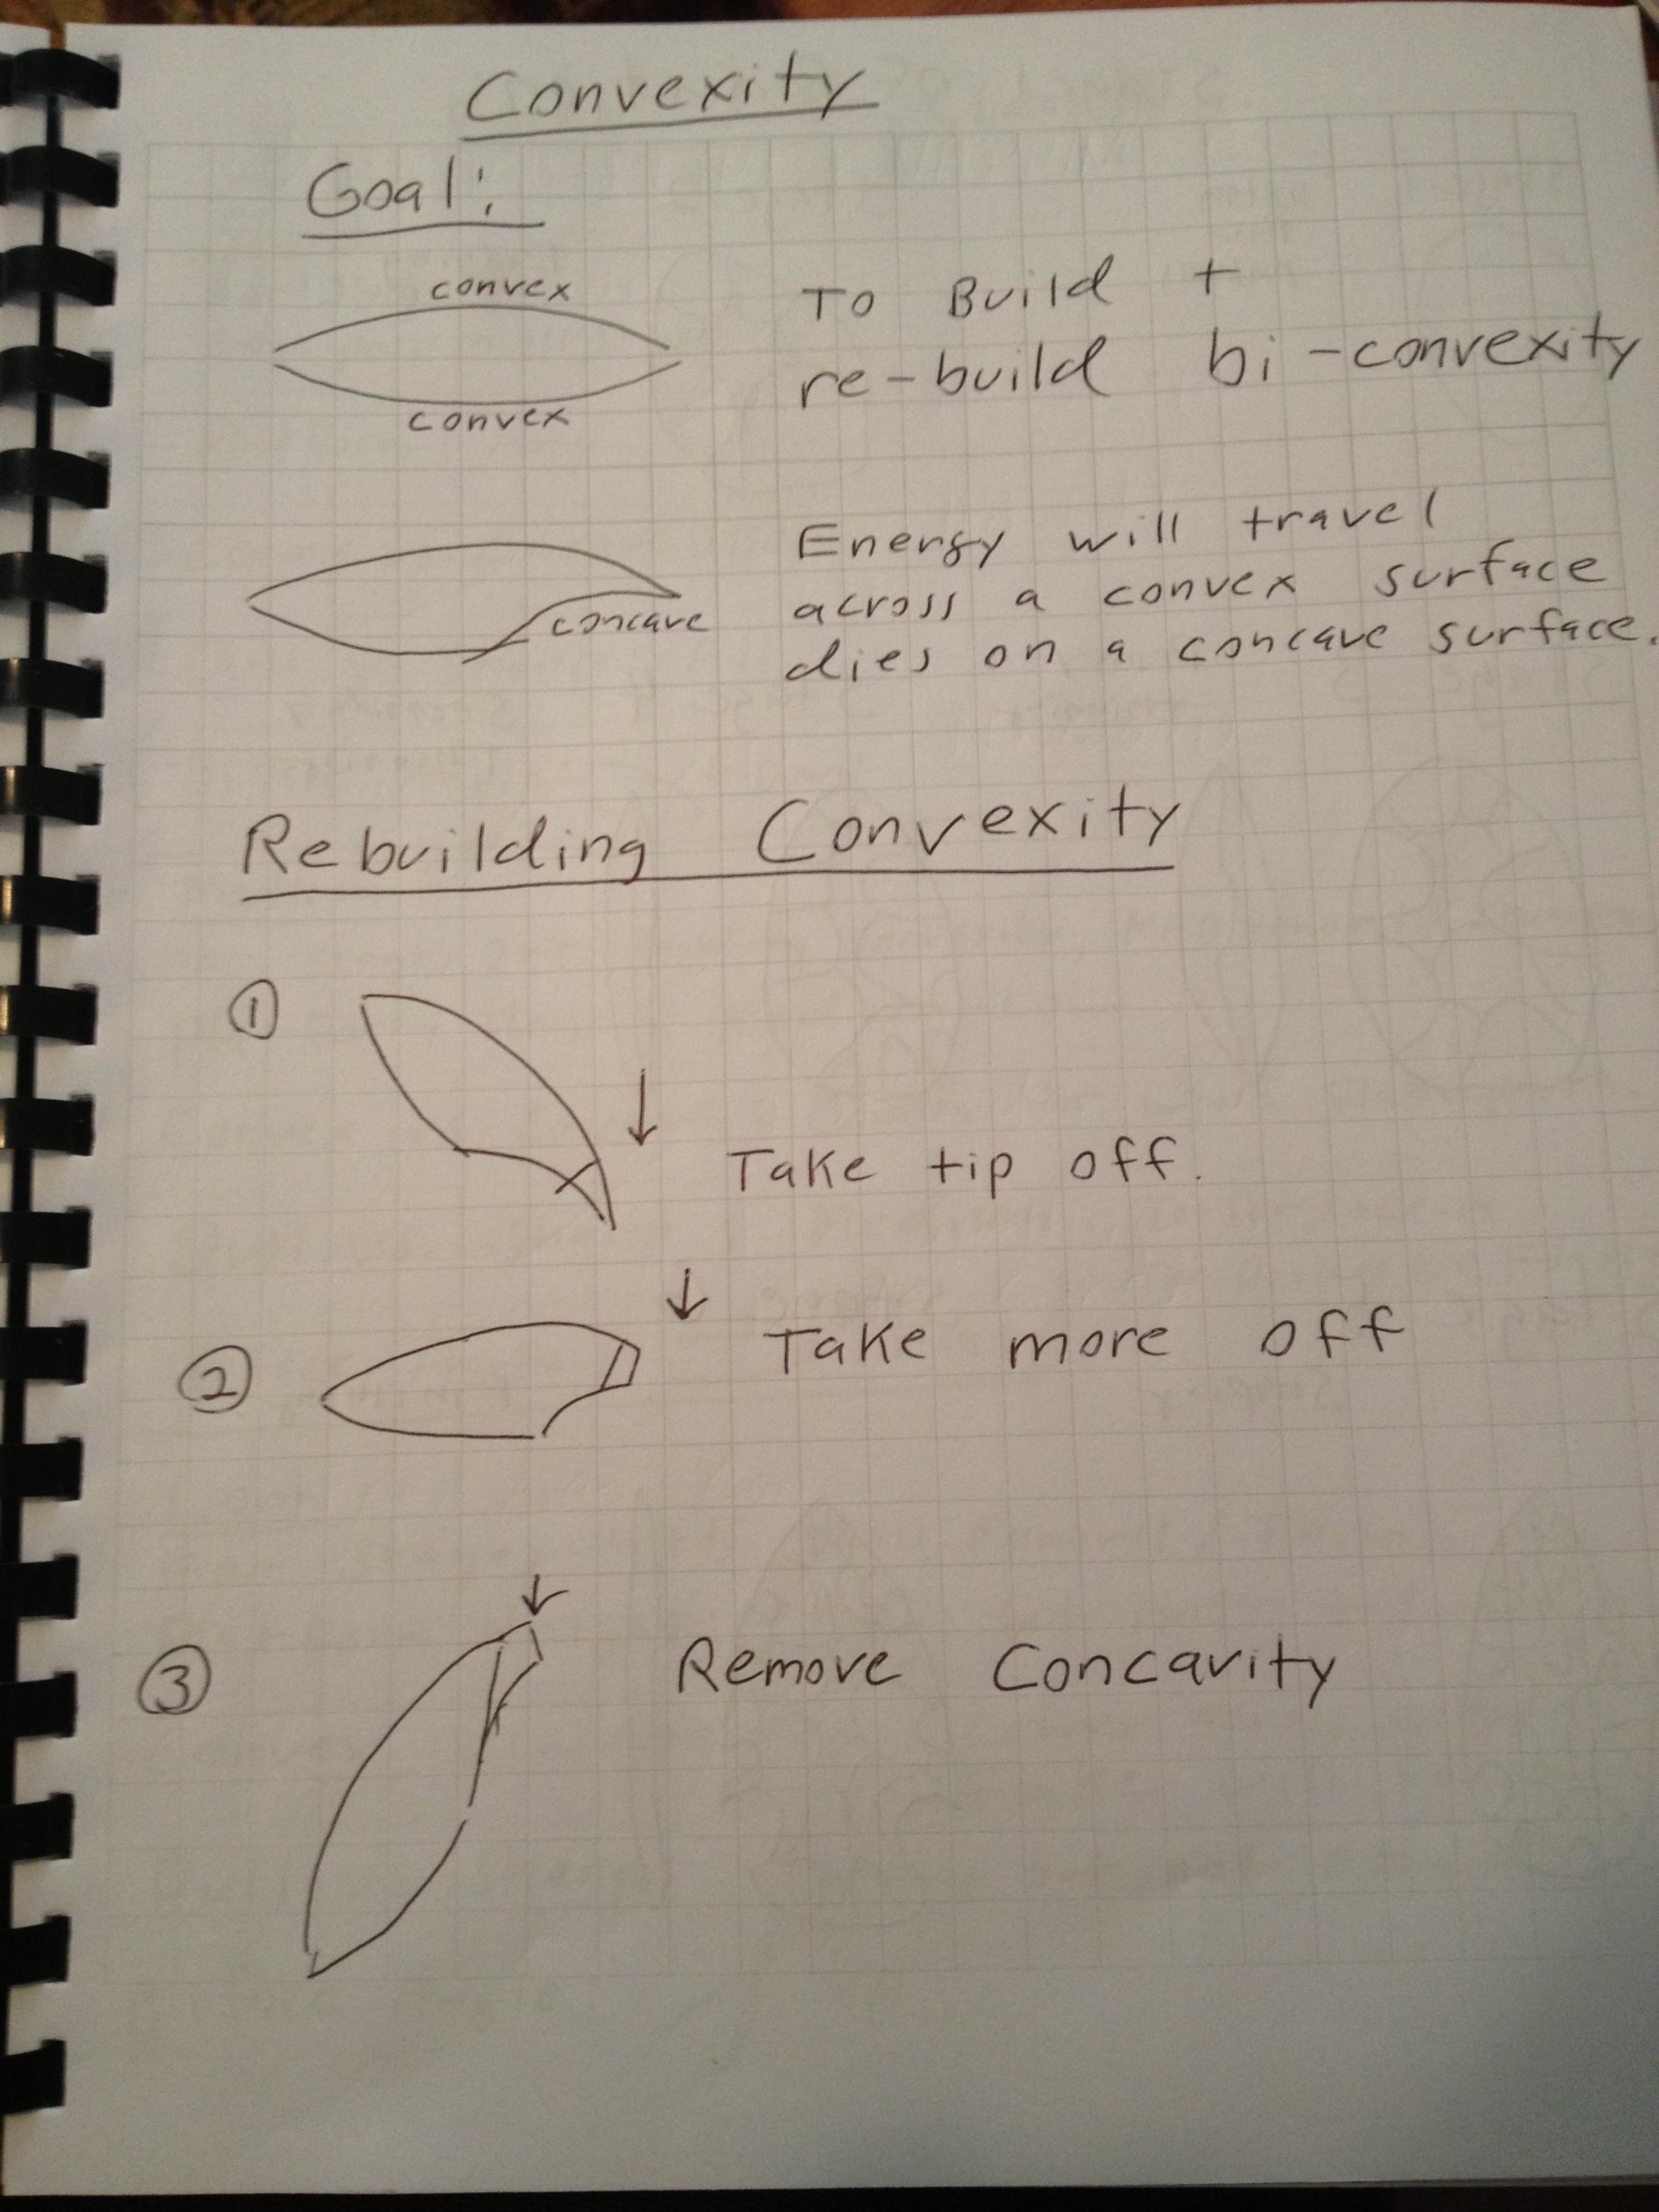
The science behind Flintknapping:

The Hertzian Cone
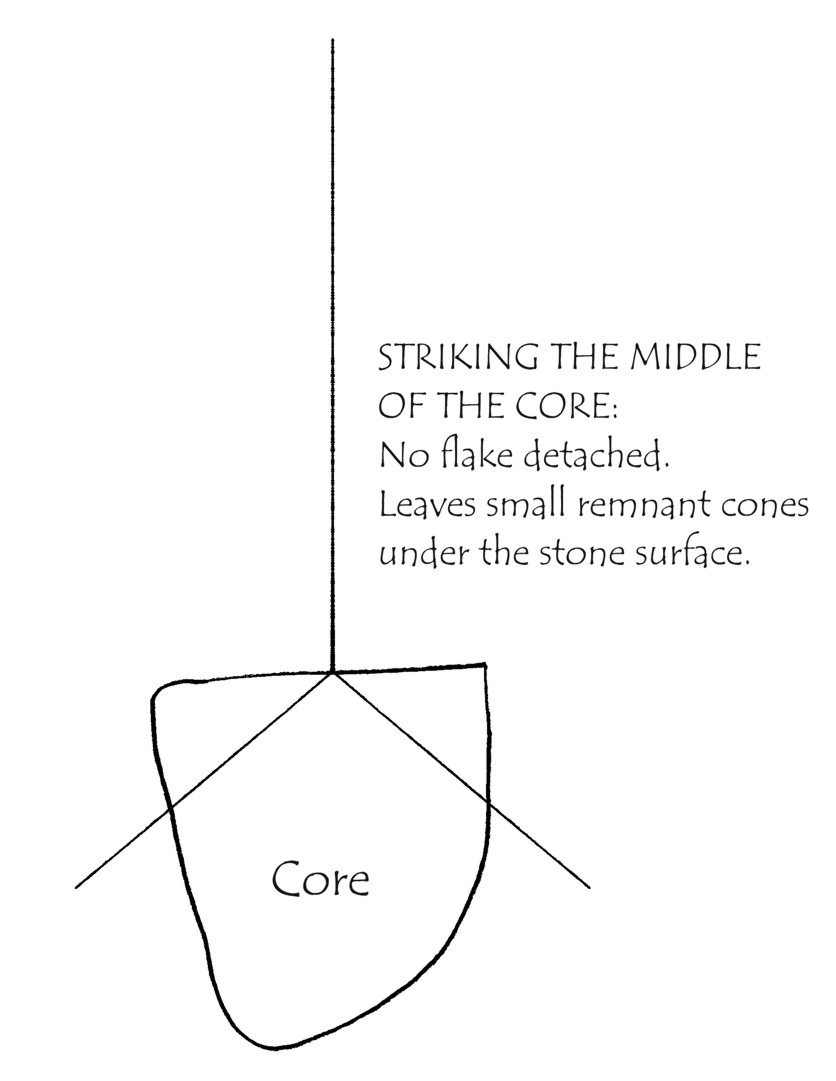
How not to smash
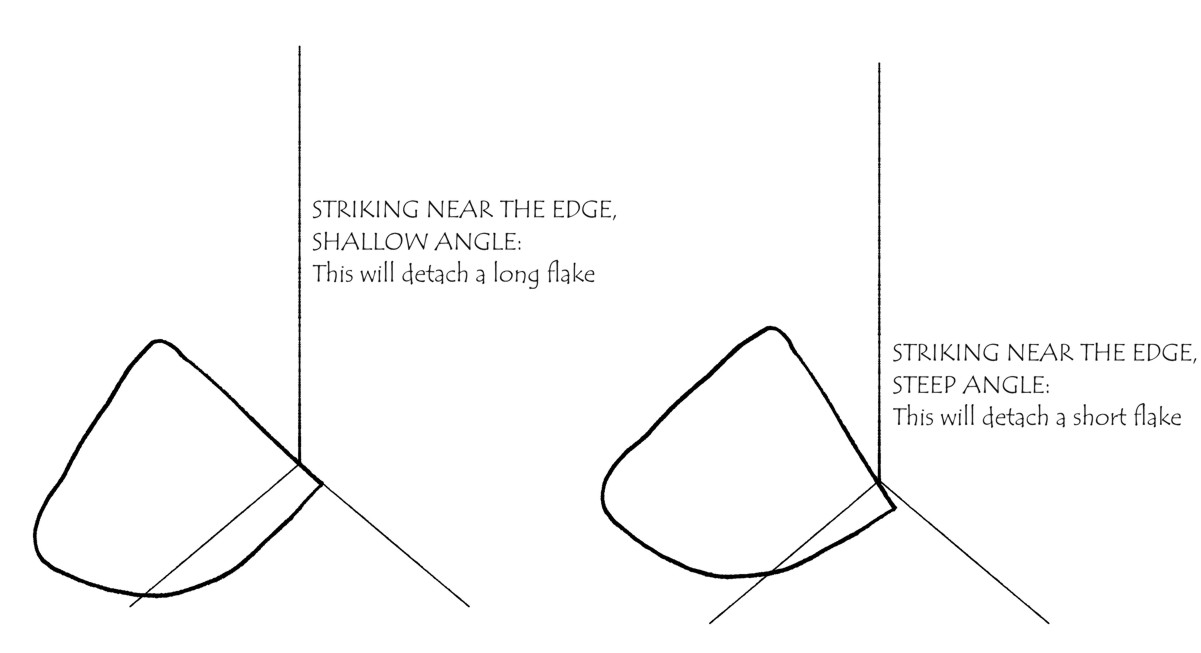
How to Smash
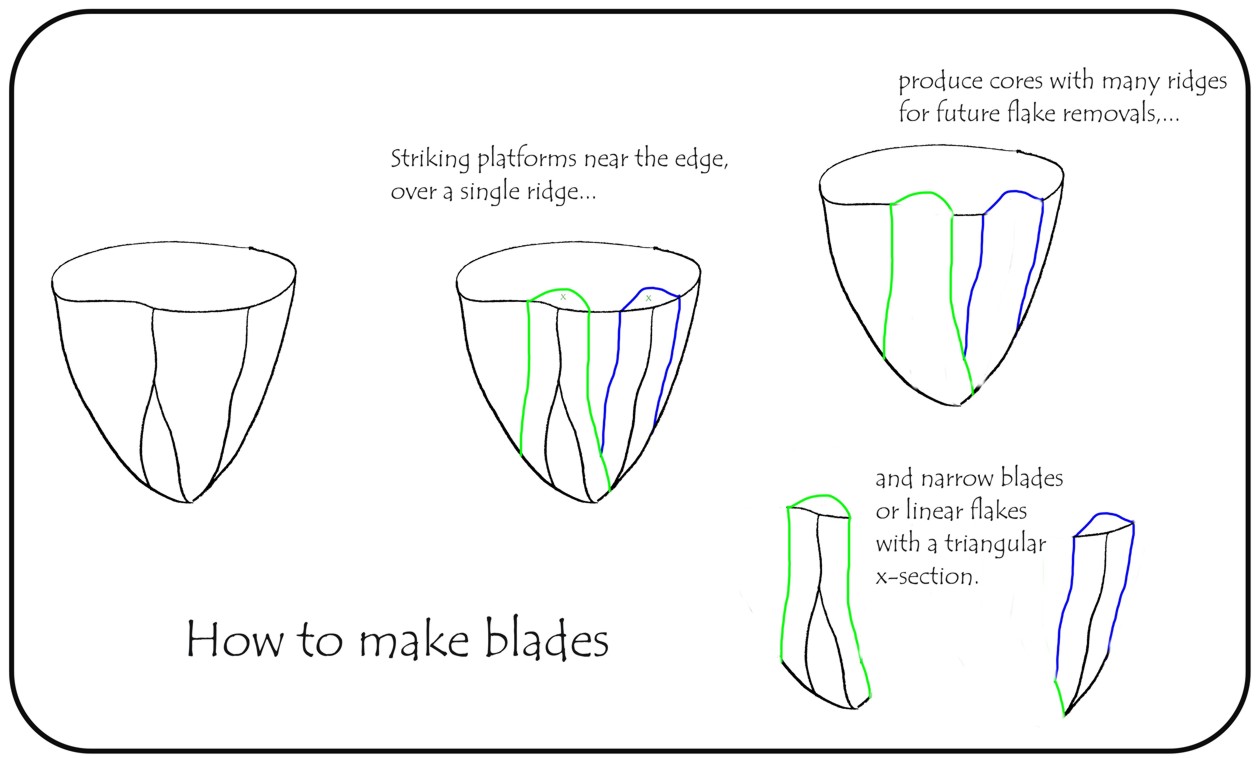
Starting a Blade

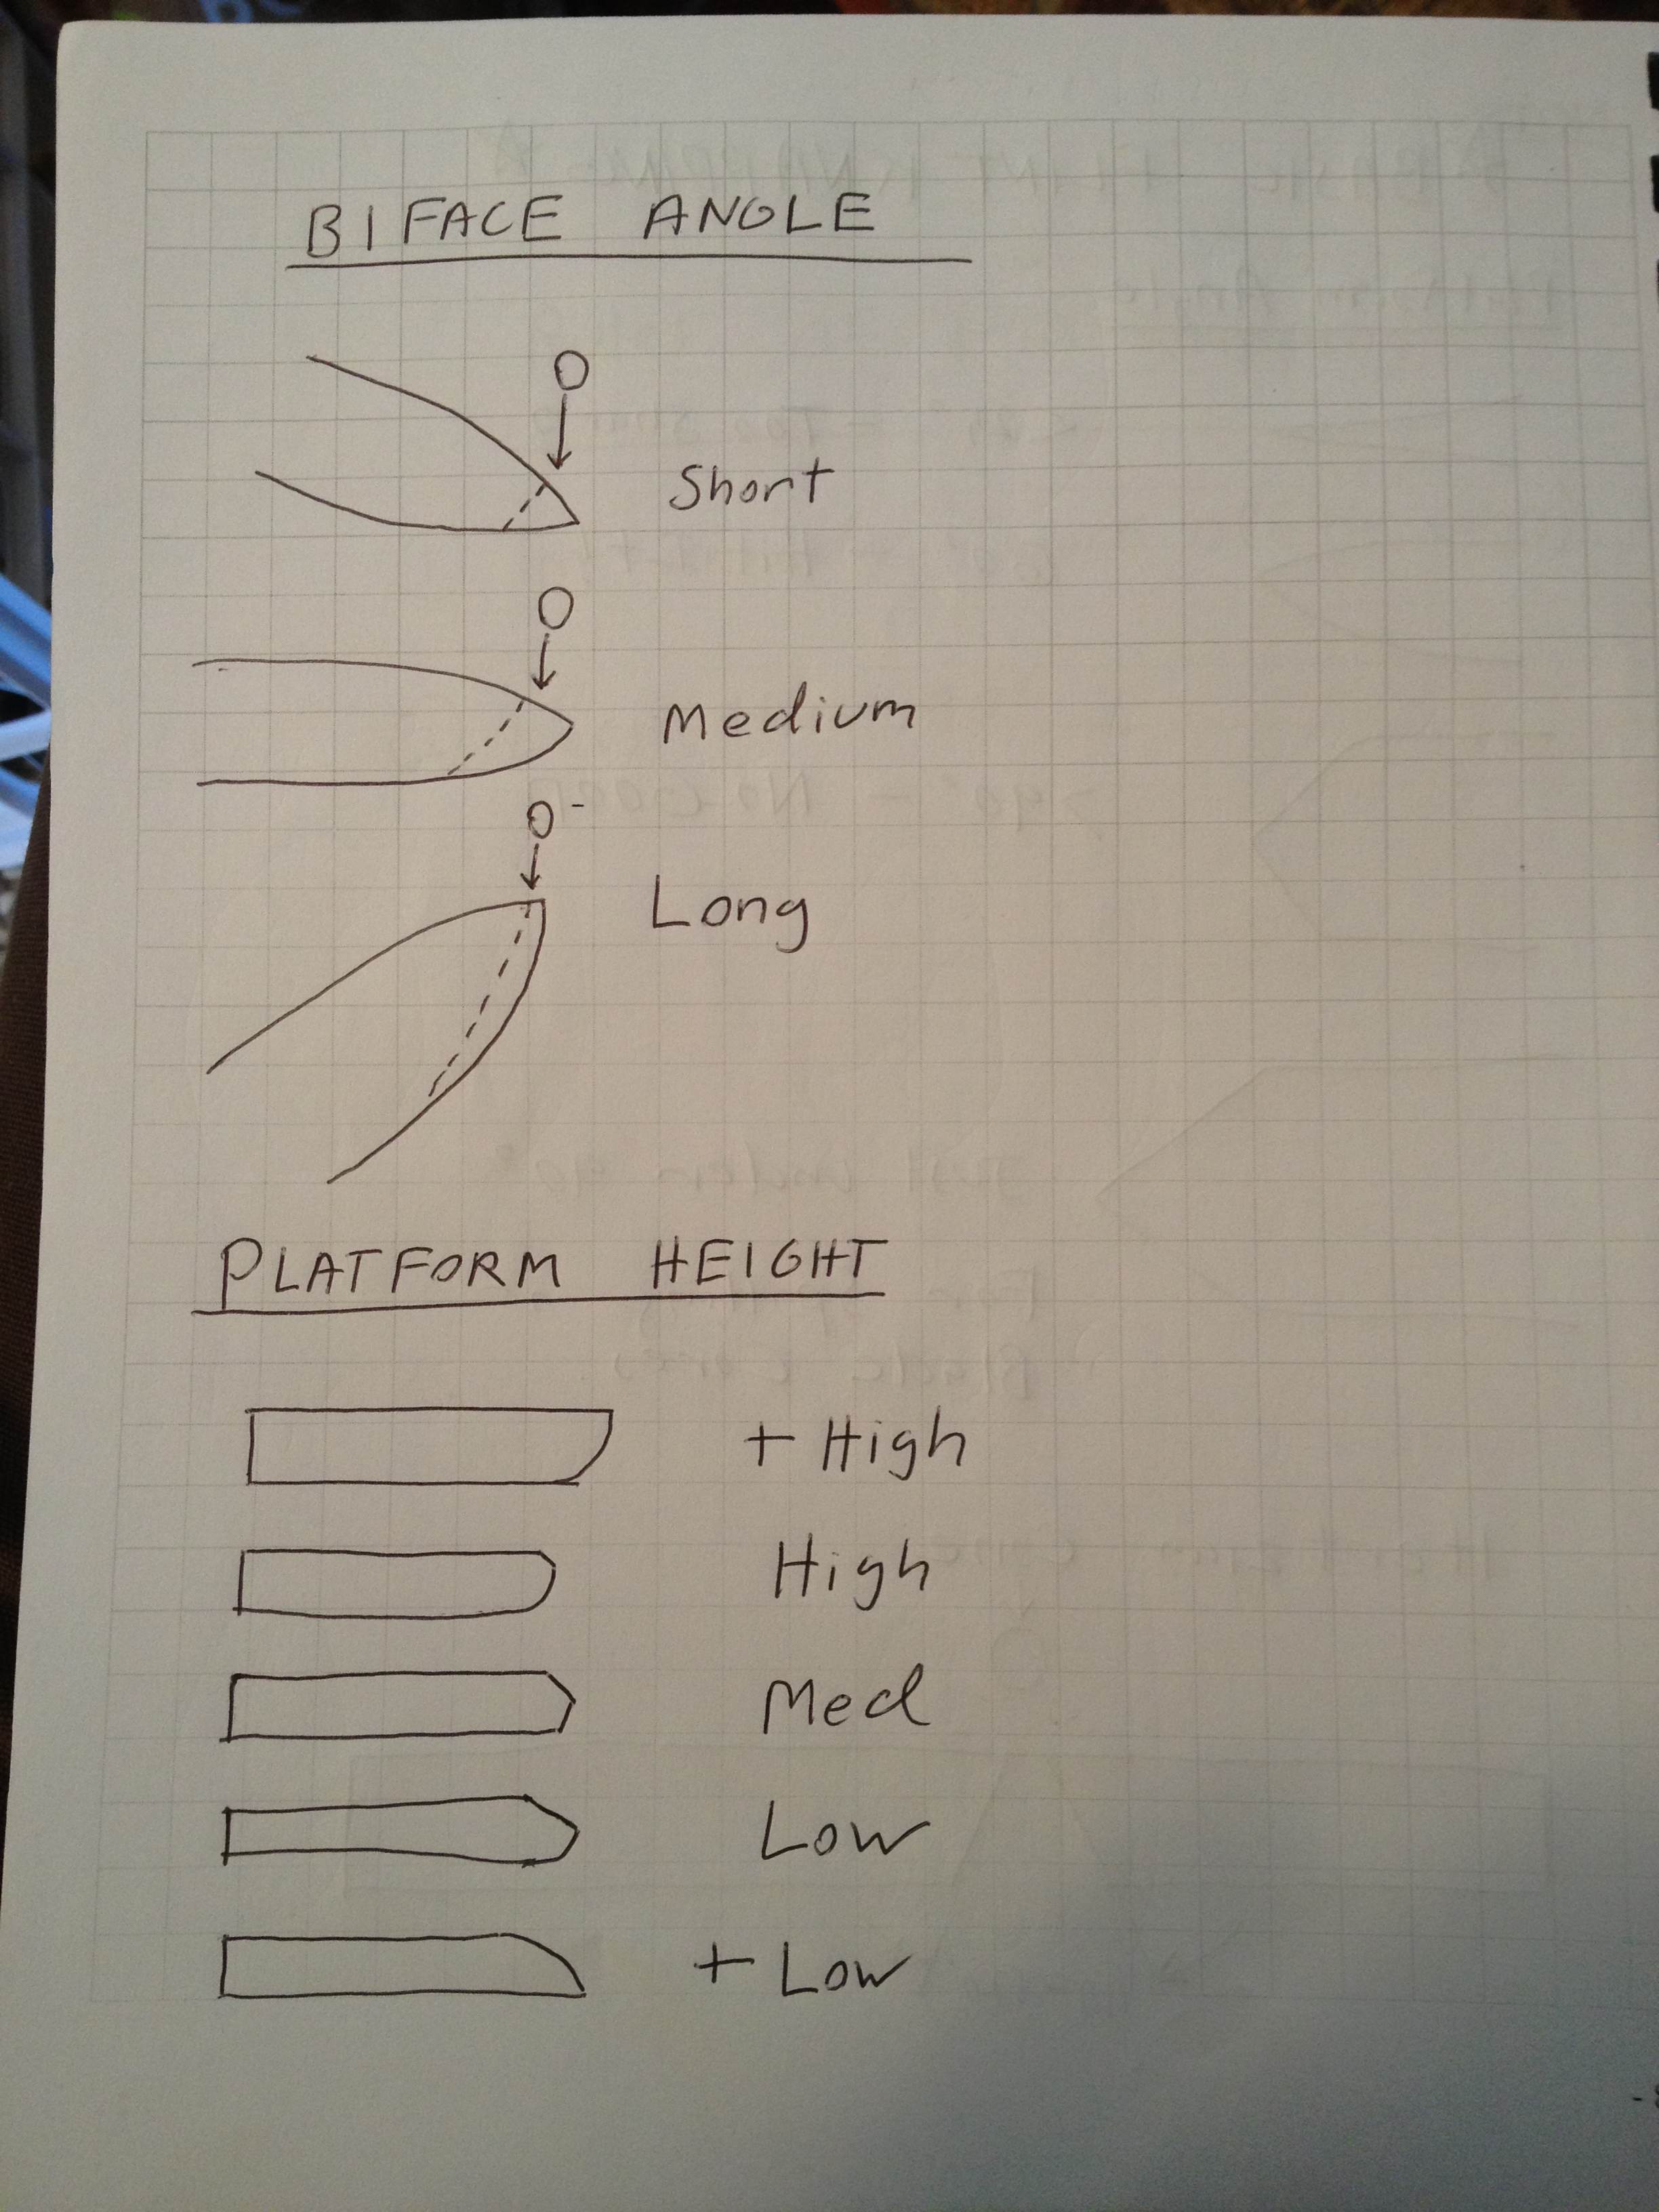
Starting a Bi-Face
ROOTS School Video on Flintknapping.
Flintknapping Notes:
Cordage:
Cordage may be the most important survival skill there is. The best cordage plants in this area are Milkweed, Dogbane and Nettle. Milkweed is far more common than the others. Dogbane is the easiest to work with, the strongest and has enough poisonous elements to keep animals from chewing on it. Nettle makes the best cordage for wet conditions. Both Nettle and Milkweed have a tendancy of getting chewed on by animals. Another great plant for cordage is Yucca and while it is not wild here in RI there is enough of it in cultivation to be very common.
Gathering Materials:
Harvest stalks in the fall after they have dried out. With milkweed there is a fairly narrow window of oportunity as by mid to late December the plants are too far gone to make strong cordage. Dogbane lasts longer and may still be good for harvest into the next spring. Nettle depends on location, many animals wait until the nettle stalk has dried enough to loose its stinking properties and then they eat them. Nettle is best harvested live, past-prime when the plant has lost its seeds and is in decline. Wear gloves.
Processing Materials:
Take your dry stalks and crush them. Break them in half and then break the wood stalk parts over your finger and peel the wood part away, leaving the fibers. Finally agitate the fibers to remove any skin and remaining wood. Once you have enuogh fiber you are ready to make some cordage.
ROOTS School video on Making Naturall Cordage
Video on reverse wrap
Milkweed Cordage
Loops can be made using the 3-ply Method. This is especially helpful when making snares.
Knives:
Everyone has an opinion about knives. All I can really say is that you should experiment and find out what works for you and then don't go around trying to tell other people what works for them. For me I like bigger heavier knives. They just do more work with less effort from me. I also like them because you can beat on them and not wory about bending or breaking anything. Ideally, two knives would be best. One big heavy knife for chopping splitting and shaping things and one small pointy knife for finer carving and animal gutting. If I had a choice and could only take one knife I would take the T1 Tracker.
Now, the TOPPS version of this knife needs a bunch of work out of the box. I ground off the transition ridge, I convex ground the blade and I changed the profile of the chopper. I am yet to make a decent sheath for it as the kydex one it comes with isn't the best. If you don't want to do all this you can by the Dave Beck version of the knife which comes perfect out of the box. The tracker gets a lot of bad press from people who think its not a good tactical knife. Thats because its not, its a bushcraft knife. Like I said, the TOPPS version needs a lot of work to make it functional. I find that with my rather vast collection of knives, I reach for the Tracker most. It just seems like the right size and weight for most jobs. Its a little big for some finer stuff. I also like to carve towards myself holding the blade in my hand. The nice big blade on the Tracker is easy to hold onto. The various profiles on the knife are super-handy too ad the chopping part of the knife is actually a good carver. If anyone local has one of these knives and wants to get it in good working order I would be more than happy to help. Also, a great sheath for the knife can be found at Hedgehog Leatherworks.
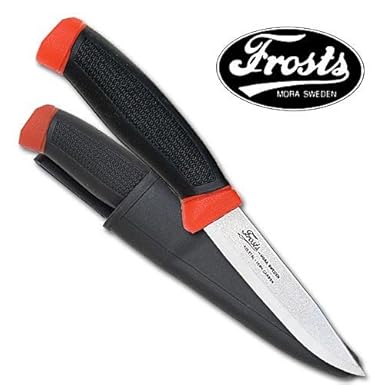
My second favorite knife only costs $9. The Frosts utility knife is a great all-round knife, not nearly as durable as the tracker but much smaller, lighter and less "crazy" looking (i.e. you will look less "crazy" when you use it). It holds a great edge. I have battoned wood with it and used it for some rather heavy tasks and it has held up fine.
If you really want to spend some money and get a decent knife a friend who is obsessed with knives turned me on to Bark River Knives. The Bushcrafter is a great knife. Mine had a stupid thumb landing on it that annoyed me enough that I ground it off (It seems that I always need to change something!). I notice that the newer versions of the knife come with no thumb landing, evidence that the company pays attention to its customers and is improving their products. I would reccomend the nice sheath with the snap. Also, as pretty as the burl handles are the micarta is practically indestructable. All Bark River Knives are Convex ground which means a tougher knife.
Knives are one of the areas where I would be inclined to not listen to other people's advice. You really need to find what works best for you. Experimentation is key. Remember that with a bushcraft knife you are not only carving. You will be hacking, chopping, stirring soup, prying, drilling, notching, spearing, chipping, skinning, fleshing, smashing, shelling, peeling, etc. For me, a perfect knife would be full tang, carbon steel. well sheathed and comfortable in the hand.
Knife-Free Survival:
The ultimate in skills is Knife Free Survival. At ROOTS school they stress this in their survival course and many of the skills once learned with a knife must be reproduced using only stone tools. Or, No tools.
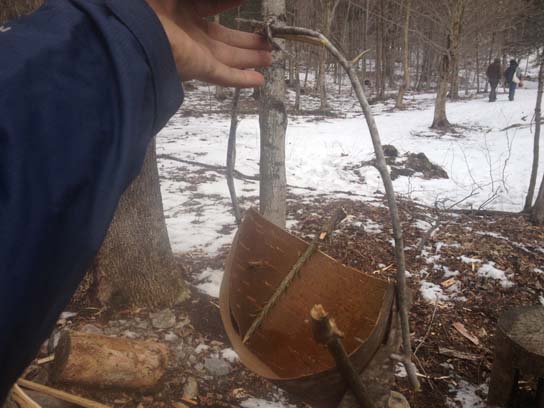
An impromto basket with handle made using only stone tools.

A figure 4 trap made using only broken sticks.