The Rhody Survivalist ~ Online Resources
Rhody Survivalist: Shelter
Shelter is first in the sacred order for a reason. In the right conditions you can live without it for the shortest period of time. Now, if its the middle of summer and you are beginning your progression to primitive I'm not saying you should knock out a debris hut before setting up your water source. I'm saying you need to check it off the list first. Do I need shelter to make it through tonight? If yes - commence building shelter, if no - you may want to begin locating a water source.
Clothing: Cold Weather Layering
Shelter also includes your clothing, your first line of defense. Your ditch bag should contain all the clothing you need to live in your area year-round. By using the principles of layering you should be able to live comfortably year-round on a rather small collection of clothing.

Hycreeks guide to layering is a good basis for understanding the principles of layering.
If I could choose one material to wear in a survival situation it would certainly be wool. Warm when wet or dry, durable and quick drying no synthetic fiber has yet matched up with the benefits of wool. Here is REI's guide on the benefits of wool. Of course, probably the oldest outdoor clothing company in the world is Woolrich who has a huge selection of great wool products. Other favorite wool clothing companies are King of the Mountain and Filson. Both of these companies have expensive products but they are worth it!
Covering up: A hat and neck warmer are essential to keeping warm.. It is as essential to cover the neck and core areas of your body. According to the US Army Survival Manual: You can lose 40 to 45 percent of body heat from an unprotected head and even more from the unprotected neck, wrist, and ankles. These areas of the body are good radiators of heat and have very little insulating fat. The brain is very susceptible to cold and can stand the least amount of cooling. Because there is much blood circulation in the head, most of which is on the surface, you can lose heat quickly if you do not cover your head. - FM 21-76 US ARMY SURVIVAL MANUAL, BASIC PRINCIPLES OF COLD WEATHER SURVIVAL, PG 148.
Infrared map of where the body loses the most heat.
Primitive Clothing:
Primitive clothing is illusive. It is one of the most ignored and misunderstood skills in all of wilderness survival. Often ignored due to its difficulty and due to the fact that in most cases you need to kill an animal to have the proper materials. Basically, primitive clothing is made of skins (primarily deer) and fur (smaller critters) cut and then sewn together using sinew and rawhide. All of these are difficult to make. Your ditch bag should get you through the first year or so. Eventually however, you are going to need to make some clothing and begin the progression to primitive.
Brain Tanning: Skins and furs are made the primitive way from rawhide by brain-tanning which involves skinning the animal, soaking the hide for a few hours (for hair-on applications, longer to slip the hair off). Next stretch the hide tight on some framework and while the hide is still wet remove the hair and flesh with a scraper and allow the hide to dry into rawhide (like the stuff your dog likes to chew on!) Raw hide can be used as cordage in areas you need a lot of strength. Now you want to brain-tan your rawhide. Tanning softens and colors the hide. Soak the hide until it is soft. Over light heat mash the animals brains into a paste. Work this paste into the hide. Do both sides if you have slipped the hair off. Put the remaining brains in a water mixture and soak the hide in this mixture. (Skip this step with hair-on method). Stretch and work the hide until it is dry. This is a long process so be patient. Work with a smooth rounded stick until. Test with the back of your hand to check dryness. If it feels cool keep going. Finally smoke the hide over some green leaves or punky wood. Keep the fire cool. The smoke will cure the hide and make it last longer. Finally run the hide back and forth over a smooth bark less branch until it feels pliable.
Our group hide at Tracker
Making Sinew Cordage for Sewing: http://www.primitiveways.com/secrets_of_sinew.html
Brain Tanning Furs: http://www.braintan.com/articles/furs/george1.html
Step by step brain-tanning instructions: http://www.smokylake.com/history/native/tanning.htm
Skinning a deer in preparation of Brain-Tanning: http://www.braintan.com/articles/Skinning.html
Birch-bark Shoes: http://wildwoodsurvival.com/survival/clothing/birchbarkshoes/index.html
Non-Primitive Shelters ~ Bivys, Tents, and Sleeping Bags:
Your ditch bag should include a bivy sac which is a sleeping bag with a waterproof shell or "bivy". These are big enough for one person and are considered part of the ultra-light backpackers outfit. The sleeping bag should be rated down to 15 or 20 deg. F. You don't want a -20 deg. F bag because they are too big for a ditch bag. You can survive much colder nights than 15 deg. F in a 15 deg. bag it just won't be very comfortable. Down bags are very light but they are no good if they get wet so if you are going down be sure to keep it dry or you might as well have no sleeping bag at all. I personally like down because it packs so small and is so light and is great for a ditch bag. Just keep in mind that if it gets wet you are going to be building a fire.
Here is a great REI article on modern ultralight Bivys and Bags: http://www.rei.com/expertadvice/articles/bivy+sack.html
Recently Hammocks have become increasingly popular. Hammocks are great in wet environments. Another advantage of hammocks is not needing flat ground. The disadvantage: you need trees or something to hang the hammock from. Two great hammock companies are Henessey and Warbonnet.
Your Survival Cache should have tents and extra sleeping bags and shelters for you and anyone else that may show up at your place needing a place to live. Tents are bigger and more comfortable than bivys but their general size makes it tough to pack them in your ditch bag.
Remember that tents, bivys and sleeping bags produced commercially are often designed to be used infrequently and discarded after a finite number of years. If you are living in your bivy sac it will probably last only a year or two if that. Again, we enact the progression to primitive and move along to more primitive and thus permanent living arrangements.
Building Your New Home in the Woods ~ The Debris Hut:
The woods of Rhode Island are perfect for building debris hut shelters. A debris hut is one of the most basic and important of all survival structures. They are brilliant in both their function and their simplicity. Not only will they keep you dry but with the right insulation they will keep you warm in the winter with no tent or sleeping bag! In January we constructed this Debris Hut and made a video so you can see the entire process:
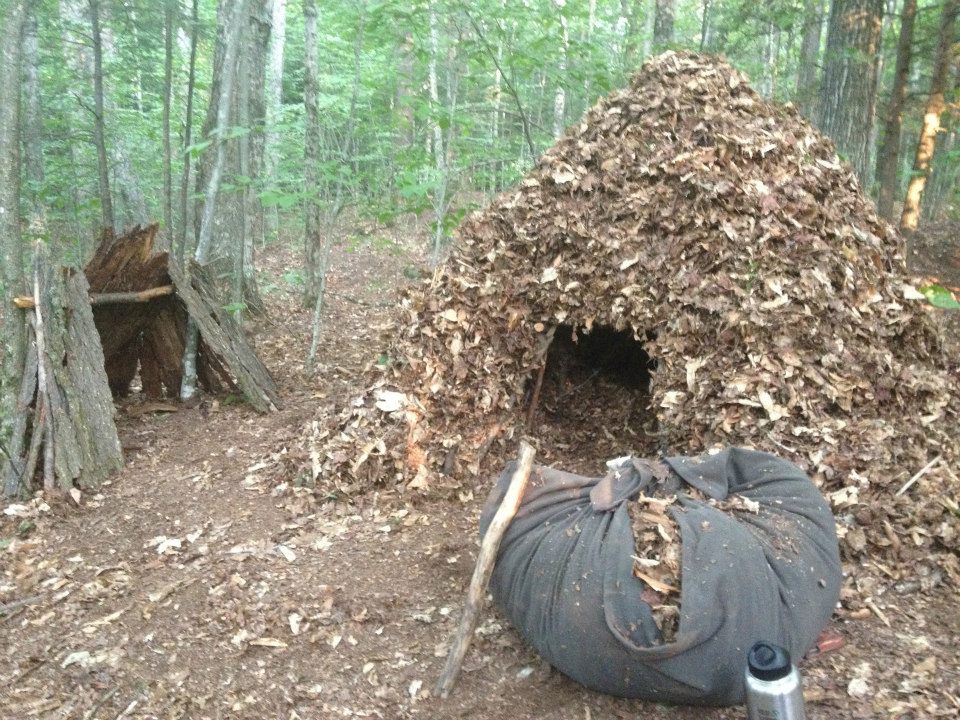
My Debris Hut in Vermont. Front Door with a blanket stuffed with leaves as a plug. A small bark "shed" to the left provides a nice storage spot for extra clothing and firewood. Note the throwing stick leaned up against the door plug.
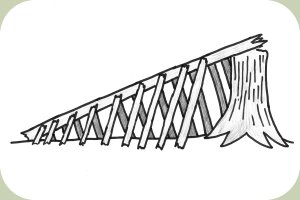
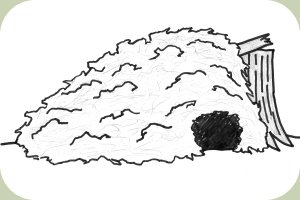
Starting to get the debris hut full of debris begins with a load of debris on the floor, getting in and packing it down, once this is done you can start to fill in both sides around you. It doesn't take a lot of leaves on top to stay warm. Cut out the angles, especially the high spot nearest the entrance with horizontal sticks and stuff that dead space with debris.
Debris Hut Maintenance:
I was surprised by how much a debris hut used over the course of several months needed so much maintenance. For one thing, every dry and sunny day you need to remove, dry and fluff the debris to make new air pockets, especially the bedding material. Then you need to smoke the whole thing fairly frequently or bugs will move in. If you think the bugs won't bother you, think mosquitoes, not spiders. One shelter I built and went back to after a month was infested with mosquitoes even with the door plug sealed. A month latter it was full on winter, I climbed in and slept great for about 4 hours until I heated up the inside of the debris hut. I woke at 2 am getting buzzed by about 20 mosquitoes. All I can figure is that they hatched from the leaf litter. Who knew? Finally, it is amazing how fast the leaf litter disappears, especially the bedding material. Long term you will probably want to start replacing your bedding with grass mats or better, a grass sleeping bag.
Debris Hut Diagrams: http://www.wildwoodsurvival.com/survival/shelter/debrishut/jldebrishut.html
Basic Debris Hut: http://www.i4at.org/lib2/debris.htm
Another Debris Hut: http://www.natureskills.com/survival/primitive-shelter/
Dispelling Debris Hut Myths: http://www.youtube.com/watch?v=lC_SQo7O18s
A Shelter in Hiding ~ The Scout Pit:
The Scout Pit has a two advantages over the Debris Hut. The primary advantage is that is is concealed and hidden so you can sleep in peace without fear of being discovered. If you are in a dangerous area and you have the time, a scout pit is a good way to build a concealed shelter and hide in plain sight. The other advantage is insulation. If your pit is deep enough you are not only out of the wind but you are potentially deep enough to take advantage of the earths naturally warm temperature.
Maine Primitive Skills School Video on Scout Pit Construction:
Another video on Scout Pit Construction:
Photo Essay on Building a Scout Pit:
http://www.wildwoodsurvival.com/survival/shelter/scoutpit/ygas.html
Winter Scout Pit with Fire Plan: http://www.wildwoodsurvival.com/survival/shelter/scoutpit/jlwinterscoutpit.html
Shelter Flooring and Insulation:
The only way you will ever be warm in any shelter is to insulate yourself from the ground. As you can see in the infrared picture above a lot of body heat escapes from your core and your back. Laying on the ground, this body heat will move to the ground, the ultimate heat sink. So you need to insulate yourself from the ground. One way to do this is to make a grass or thatched mat. If you have the time this is great. If not, the easiest way to do this is what Tom Brown Jr. calls a "Twig Mattress" as described in the Tracker School Newsletter:
"Given the fact that much of your body heat is lost to the ground you will want to pay special attention to what lies between you and the Earth. As you know through experience that leaves and debris compress and lose much of their dead air space thus reducing warming capacity. Simply by making a mat of thin twigs, no twig larger that half the width of a pencil, you create a platform that lifts you off the ground a few inches thus trapping and holding your body heat that would normally be sucked away by the cold ground.
Grandfather taught us to build this twig mattress by first layering in several inches of leaves across the entire bottom of the Debris Hut. On top of that initial layer of debris I then build a thick mat of little twigs at least two inches thick. I want to make sure that the twig mattress will support my weight and keep me off of the ground so before I continue I will lay on it and make sure I have at least two inches of space below me supported by the twigs. Now on top of the twig mattress I will stuff the entire Debris Hut with the soft luxurious debris. When I crawl into the hut I do so at the highest point so that much of the debris is underneath me and further insulates and protects me not only from the ground but the little twig mattress. I find that this one thing makes all the difference in the world for staying warm. I’ve often seen students on the Advanced Standard Classes who were very cold the first night in their Debris Huts just simply add this little twig mattress and find that their second night that they were not only warm but were actually hot and had to open the door through the night".
Maine Primitive Skills School Video on Grass Mats for Shelters:
Awesome Grass Mat Construction Technique:
http://eaglegoesdancing.blogspot.com/2010/08/how-to-make-grass-mat.html
Snow Shelters:
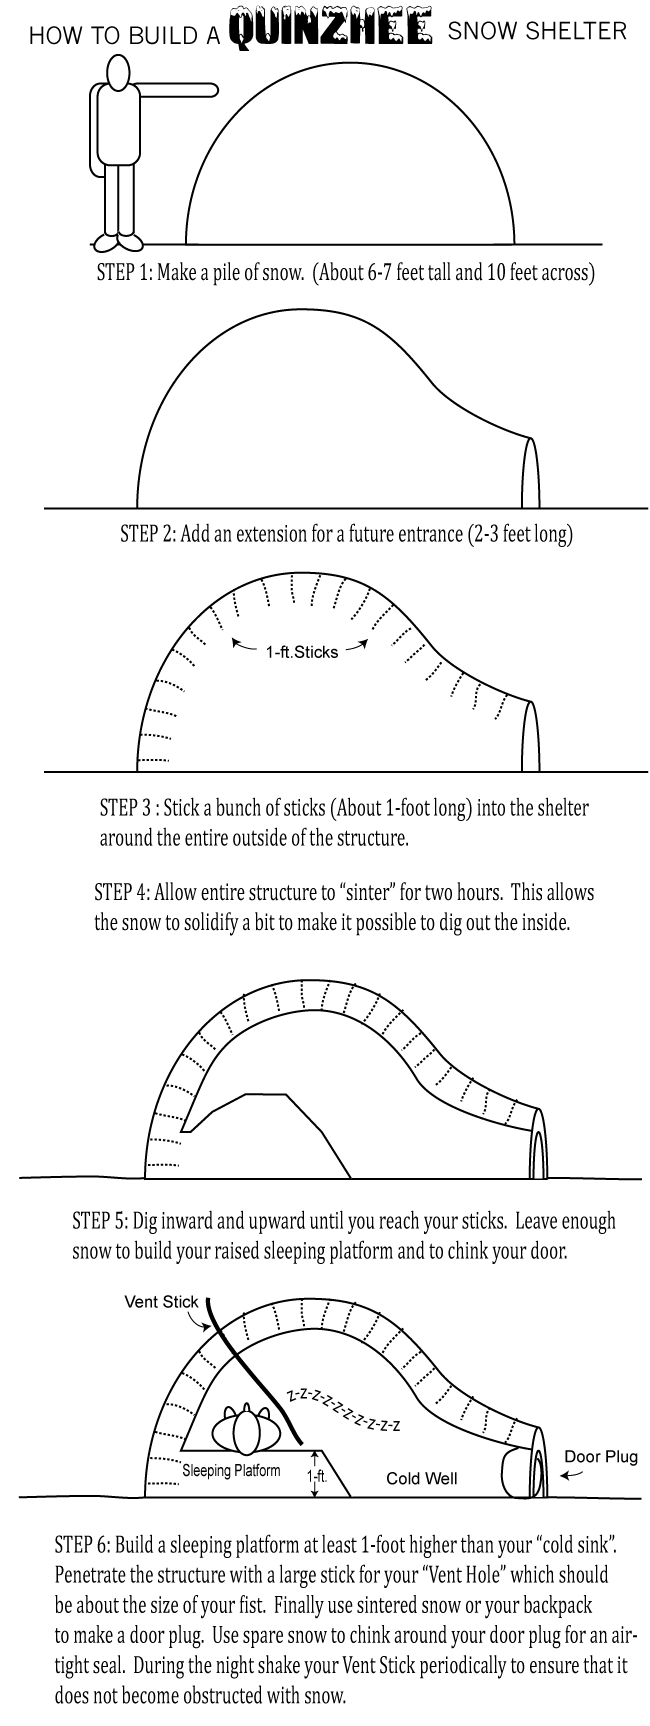
Amazingly, a snow shelter can be far more comfortable than a debris shelter. Snow is an amazing insulator, sometimes the biggest problem with a snow shelter is keeping it BELOW 32 degrees F! Once that magic number is reached, a snow shelter will quickly make you wet.... and cold!
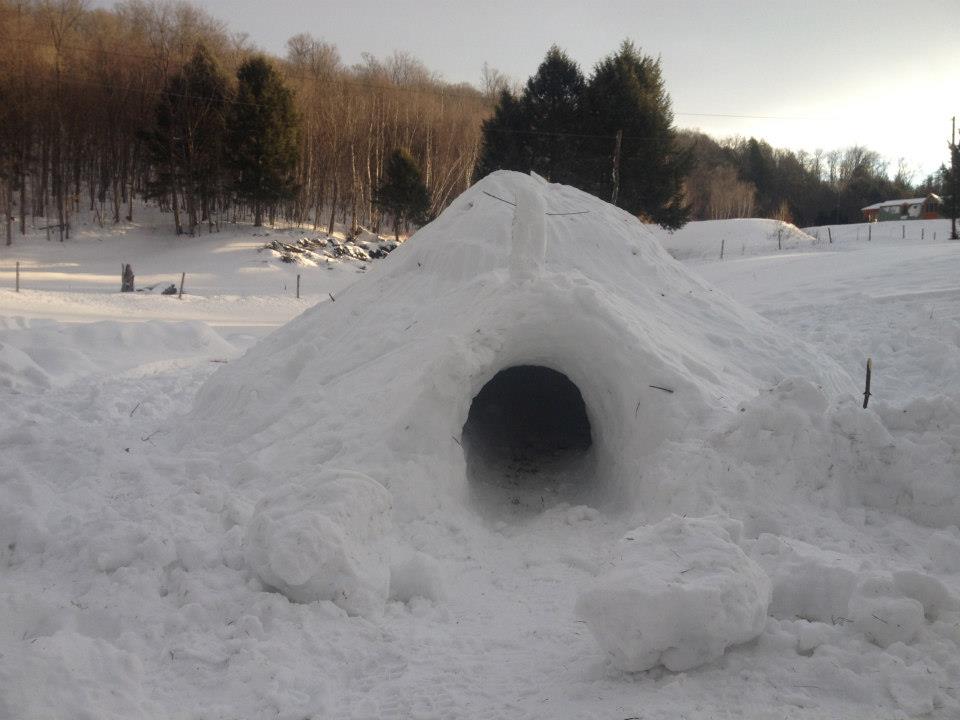
My Quinzhee: Toasty Warm! The door-plug "bricks" are on either side of the entryway. The hardest part of getting into a quincy is plugging the hole from the inside. If you come up with a clever technique to do this let me know.
The Igloo:
The poor Quinzhee is a short term shelter for maybe a week or two if the weather is just right. If you are going to be spending a season in the north country you need to upgrade to a better neighborhood. It is time to get rid of the Quinzhee double-wide and move in to a a full colonial Igloo. I have not yet built one myself but hope that the day I am an Igloo veteran is not too far off.
http://www.primitiveways.com/igloo.html
Amazing old video about building an igloo near the shores of Hudson Bay.
Group Shelters:
The Debris-Pee:
This is a bit of a more long-term solution to a survival situation in that it is a more comfortable living arrangement than a debris hut. I will however say a couple of things about the fire. Even a properly drafting shelter will be somewhat "Smokey" inside. Long term health effects are probably negative. Also, the amount of extra energy used by survivalists to keep a fire going all night due to daytime wood gathering and someone having to stay up at night to actually watch the fire could make this a much less attractive option than a debris hut. However, group living has several advantages one of which is in keeping each other's attitude in check. Also, a rainy day spent working on projects inside the group shelter is much nicer than a day spent laying in the debris hut hoping for the rain to stop.
Building a Debris-Pee:
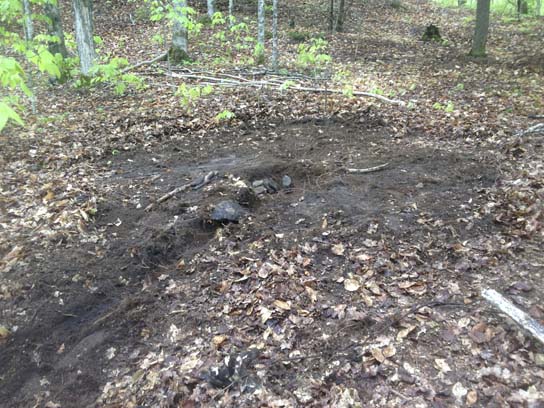
step 1: Draw a circle big enough for everyone in the group to sleep in around a central fire pit and leave some space for firewood. Clear a piece of ground and dig a lined trench to your central fire pit. (6 People may be the maximum for one debris-pee)
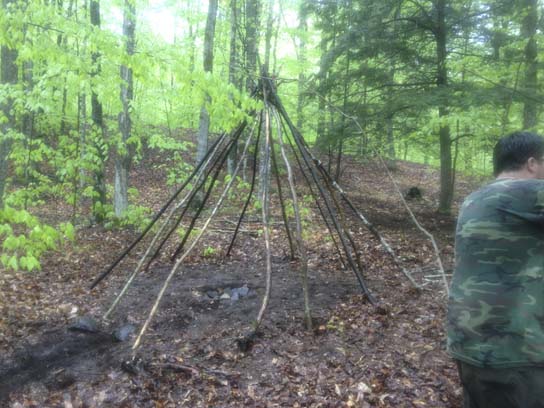
Set up your main support poles in tee-pee fashion, keep the sides as steep as is practical but at least 45 degrees.
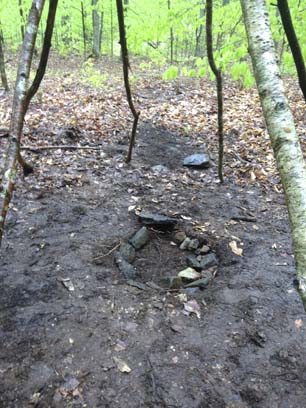
Create your fire pit and bury your air channel with flat rocks. This will allow air access to the fire and permit the structure to draft. It allows outdoor air into the fire without chilling the occupants.
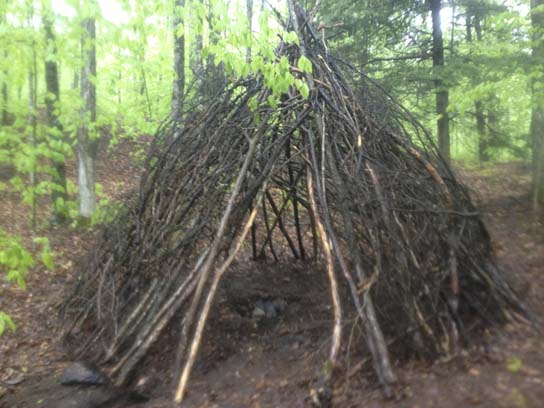
The Lattice applied, now its time to add some leaves!
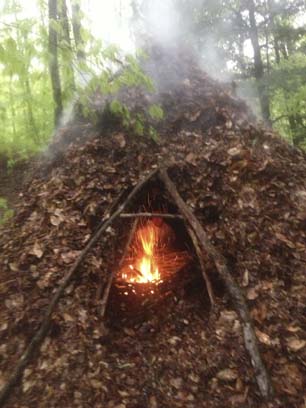
Stack on your debris, create an opening similar to the debris hut. Ideally you will have a blanket or grass mat for a door that you can stuff leaves around. Be sure to dry out and fill the debris hut with leaf litter bedding to sleep in for warmth.
Long Term Shelters:
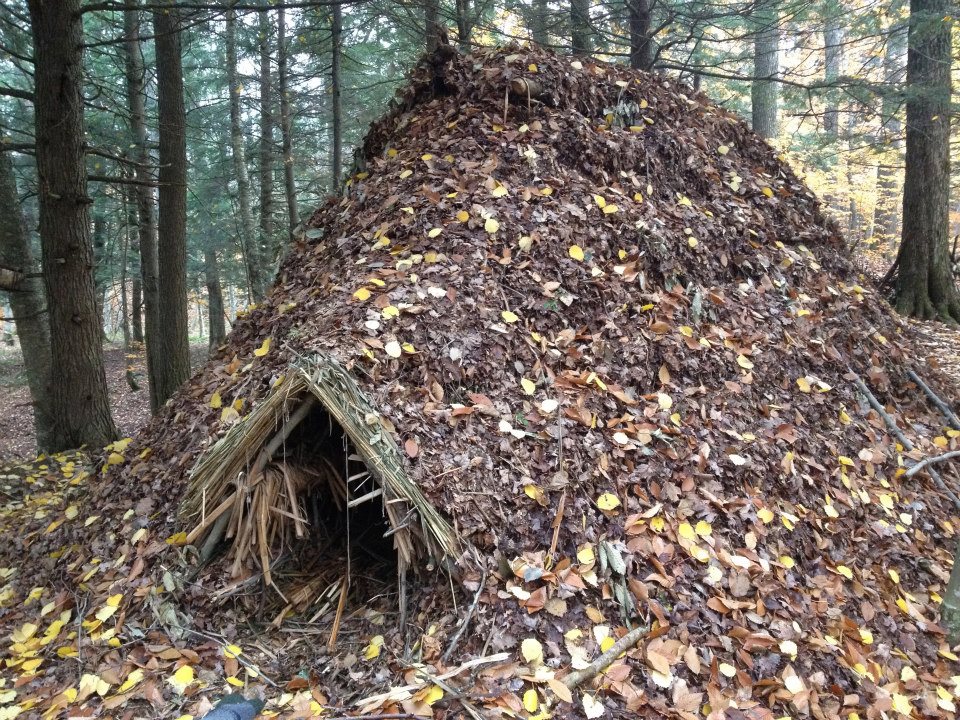
Long Term Group Shelter at ROOTS
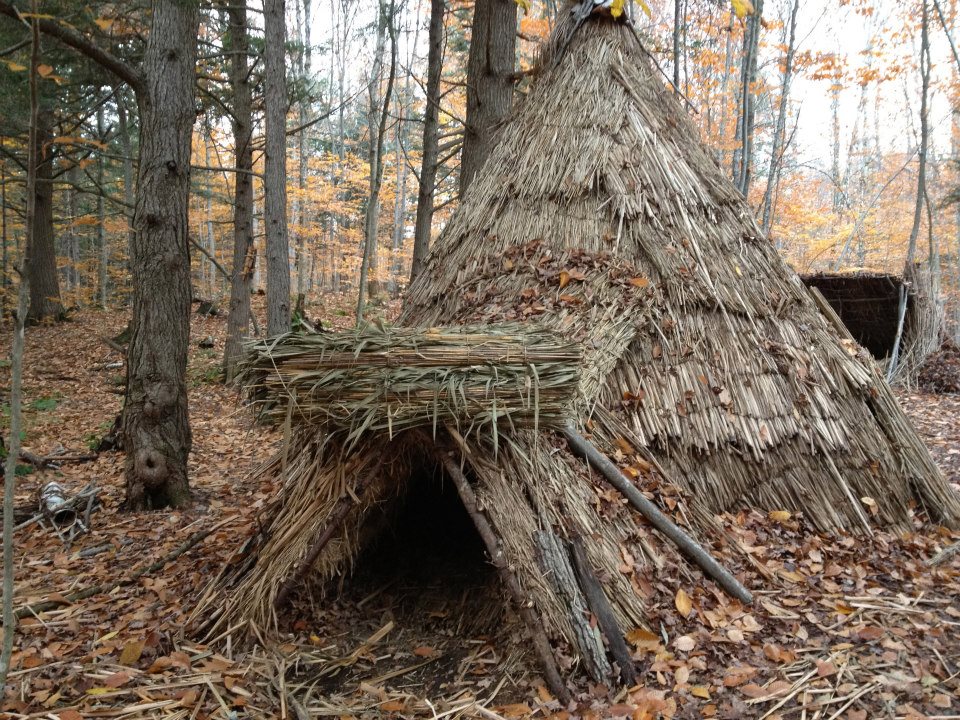
Long Term Primitive Shelter at ROOTS
Had to share this incridible shelter building effort
Other Shelter Resources:
Other Shelter Types: http://www.woodlandsurvival.com/shelter.htm
Jackmtn Shelters (Very Cool!): http://www.jackmtn.com/gallery/Primitive-and-Traditional-Shelters?page=1
Wigwams: http://www.nativetech.org/wigwam/phototour.html
Woodsmonkey Winter Shelter: http://www.woodsmonkey.com
Advanced Shelters: http://www.wildwoodsurvival.com/survival/shelter/men95/index.html
